This post is probably only going to be entertaining if you think energy budgets and renewable power generation are sexy.
Harmony and I have agonized about how much power we’re going to need on this trip. We have a goal to be self-sufficient as much as possible, especially when it comes to our energy. We imagined that we’d be able to anchor out in places for a couple weeks at a time before needing to resupply on food or water; however,
testimony from a young cruising couple we met last year who had just gotten back from Mexico cautioned that their biggest expenditure was the regular marina fee (over $100/night!) to top up their batteries. When money is time, that isn’t going to cut it.
All power onboard Serenity (when not plugged into the dock) comes from two 110-amp-hour 12V batteries, plus a separate starter battery for the engine. To preserve their longevity, you’re never supposed to drain the bank by more than 40-50%. In real terms, that means you could run this laptop (which draws ~5 amps) for 20 hours, or run a refrigerator (3 amps) for around 30 hours. Or you could run both for, uh, fewer hours.
Then there are the navigation and anchor lights that are supposed to stay on at night depending on the circumstance (upwards of 7 amps when all are turned on), plus the interior lights, small conveniences such as fans, and other electronics that need occasional topping up. The way we would draw power would have us heading for civilization every other day. We do have the option to use our engine to charge the batteries, but it’d be super noisy, inefficient, and an old mariner told me it’s bad for the diesel to run it if you’re not going anywhere. Old guys on the water are to be feared and heeded, Coleridge was very emphatic about that.
Luckily, there’s something to be done about it provided you have time and a little money – as little money as possible, the way we like it.
Generally if you want to meet your power needs you either have to increase generation or decrease consumption. Here’s what we’ve done so far in three exciting headings:
Reduce!
LEDs
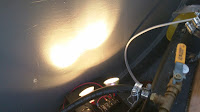
 The first night Harmony got home and saw these, she said she felt like she lived in a limo.
The interior lights have all been reconfigured for LED bulbs, which draw 0.2 amps instead of 0.5-1 amp apiece. The first bulbs were bought from Fisheries Supply for $20 a pop, but then I stumbled upon a website that suggested using a particular kind of LED disc/strip lighting from Ikea that naturally runs on 12V but had been wired to a 125V transformer to conform to Swedish expectations.
I got a pack of 4 discs and 4 strips ($30 for four lights) and ghetto-wired them into existing receptacles (for the discs) and in strategic yet attractive locales around the salon in the case of the strip lighting. The best part about the setup is that I could light every corner of the boat’s interior for only about an amp. The other best part is that it was cheaper than I expected.
The exterior LEDs are still a work in progress, mostly because I’m still afraid to climb the mast. I do have one LED bulb for our anchor light that I picked up from the chandlery across the street. The guy warned me that the bulb would probably stick out too far to fit under the old dome cover, and he was right, and there’s a no return policy. I have not yet told him this. Luckily I mentioned off-hand to my Dad that I needed some kind of thick rubber base to make the dome stick out farther, and he went straight to a cabinet in his shop that contained exactly the thing I was looking for. My Dad has the shop that God built, but more on that some other time.
Refrigeration
This one is the most controversial, both externally and internally. We’re going to forego using our refrigerator. [OH, THE LAMENTING!]
The power draw is just too high to justify the benefits, so we’re going to give a go at preparing and preserving our food the old fashioned way. As far as I understand it, this will entail a lot of salt, vinegar, and oil, and we’d better like pickled foods. Some awesome friends of ours are river rafting people though who know the tyranny of the cooler, and they gave us a neat book on refrigerator-less cooking.
The refrigerator is currently busted anyway, so that helps the decision somewhat. At the moment we have to hoof it to the ice machine and fill buckets daily. I wouldn’t look forward to doing that chore with our dinghy.
Renew!
Wind Generation

Normally if you wanted to add wind generation to your boat, you’d opt for one of the small commercial products like KISS or Air-X which cost over a thousand bucks. I figured there had to be a better way so long as you have the ability to consider Home Depot-based construction fashionable.
This was my first real DIY project that I started when I lived in Walla Walla and toyed with the idea of owning a yurt before a sailboat. Honestly I don’t know why Harmony threw her lot in with me.
My turbine uses an Ametek 30VDC electric motor from ebay ($40 a few years back) and generally built my turbine consistent with the instructions on the following page:
How I built an electricity producing wind turbine Ametek 30 DC Motor Data
I made the blades out of PVC, and originally had 3 blades before discovering 2 might actually allow the turbine to spin faster. So say the internet forums at least. For the blade hub since I have no machining skill I poked three long screws through a PVC end cap and hose clamped them tightly around the motor’s spinning post. This has proven sufficiently strong to withstand wind storms, the ocean, and my anxiety that a blade would fly off and give one of our daysail guests a concussion.
The mounting pole is a 10′ length of 3/4″ electrical conduit set into the lazarette about 1.5 feet with two 1/8″ guy wires connected via hose clamps. This is convenient for me because I can just run the wiring down the pole and directly into the battery.
From what I’ve read about the wind charge control, it’s best not to let the turbine ever spin freely since it can either A) break the blades or B) spin at such high voltage that when it diverts back to the battery it causes damage.
The generator mount itself is just a 2×4 with a metal flange screwed on the bottom and a 10″ length of 1/2″ pipe nested inside the conduit to allow it to turn into the wind. So far the pole holds up to 30 degree tilts without bucking the generator or bending too much, but that’s without the blades reinstalled.
Instead I’ve seen it recommended to keep the turbine connected straight to the battery all the time and have the charge controller turn on a dump load from the battery when it’s full. This way there’s no abrupt switching from one generator output to another, and the battery will bleed off its own excess rather than shunt the generator output to a load that could potentially put too much resistance on the motor and burn it out. More on charge control later.
As mentioned in a previous post, the turbine at the moment only kicks out about an amp in light to moderate winds, which is somewhat less than I would expect. I think it might have to do with not using thick enough wire from the motor to the battery (I have 14AWG currently), so I may experiment with that further as the summer wears on.
Solar Power
 Sorry for stealing your photo, LQTRADE Store number 501718.
Instead of a traditional marine or RV rigid solar panel, which has a lot of value added cost and is difficult to securely install on a smaller boat, I decided to get a 68W flexible rooftop solar panel from Amazon for $230.
It performs as advertised, but because it’s 10 feet long the mounting does produce new challenges. Originally I imagined I’d stretch it along the lifelines amidships, posting the bottom of the panel out at an angle like wings. However, the panel is relatively heavy/ungainly and doesn’t conform well to the curve of my lifelines where I was thinking, so I gave up on that idea during the mounting mock-up phase.
Next I tried stretching it along the top of my boom and tied at the mast and boom end (perfect fit). I had to put a canvas backing on the panel with sleeves for the ropes because this panel comes with a sticky tar back from the manufacturer. I spliced on a 6′ electrical cable with waterproof connectors, which when deployed connected to a length of electrical wire (also waterproofed) that I semi-permanently installed along the toe rail and into the charge controller in the lazarette.

This meant that the panel would be predominantly for use while at anchor, but I could lay it out on the deck if I need the juice while under sail. Of course, with 10 feet of panel you have a much higher instance of shading sections of it with a shroud or other somesuch, and slipperiness could become an issue too if you’re clambering around on deck. When not in use, I could roll the panel up and toss it in the quarterberth.
This solution never quite satisfied me. First off I always felt leery of having an electrical connection out in the open on deck where the ocean could continually wash over it. I don’t have that much faith in my connecting skills. Second, the canvas backing was probably going to rot away over time if I listened to Harmony’s fear-mongering [I love you!], and I could tell that the tar wasn’t really meant to hold down a panel with a potential to whip back and forth.
So, with the extra time on my hands that comes from not working, I decided to retry the original plan with a different design. This time I decided to affix a series of ribs to the backside of the panel with two long PVC spines to add rigidity. Under this configuration, the panel is semi-permanently installed on the boat, but I could still take it down and roll it up if I needed to. I also shifted the install location closer to the bow of the boat, which would have the double utility of helping keep the jib on the deck when we bring it down, and it looks more dart-like which is just cooler.
Here’s how that project went:
 Whose bright idea was it to cover the back of this panel with tar?
  Sweat equity. It was nearly 90 degrees on the boat that day.
The tar scraping went well into the night, with help from Harmony and Buffy Season 3.
 This ball of tar is only a portion of what we removed from the back of the panel and was the size of my fist or the excretions of a large bear.
  The freshly clean back of the solar panel. You can see that it’s mostly just a laminated sheet of aluminum with copper strips around the edges. The panel is remarkably lighter without the tar as well.
  After adding a layer of paint for protection and to cover all the little scratches we left with chisels the night before.
 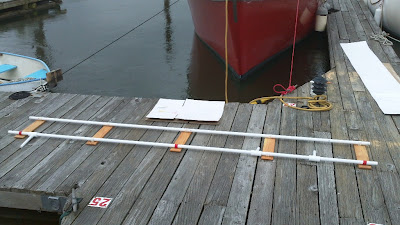 This is the mounting frame, constructed of weather-sealed cedar fence planks ($4 total expenditure), PVC spine and post-out feet for the bottom, and webbing rings to hold it together.
 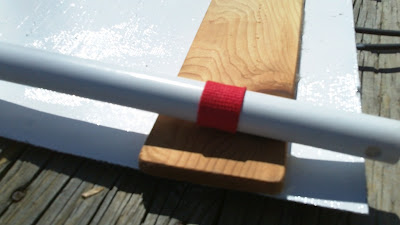 Closeup of how the ribs and spine meet. That’s nylon webbing screwed into the wood.
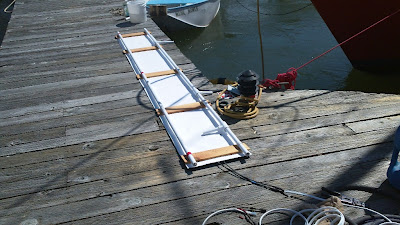 Mawwidge.
 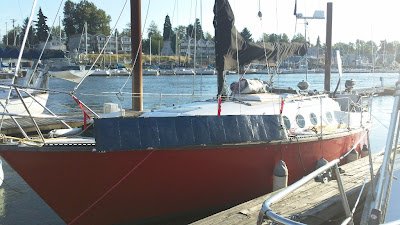 The nearly finished product. The adhesive I used for the ribs didn’t hold too well, so I had to supplement with screws along the top and bottom edge of the panel, making sure not to puncture anything electricity-producing. The beat up look is due to all the beating up of this panel we did in the name of science.
  Angle on the bow showing the post-out angle. The foot posts will be affixed to the toe rail with zip ties, the most amazing invention ever built.
 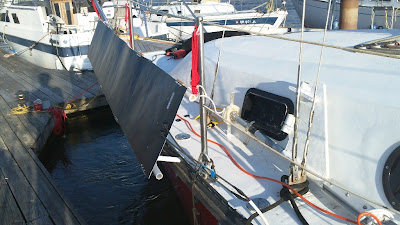 One more for good measure. Just a couple tweaks and I’ll be able to stretch out the wows in the panel.
Charge Control
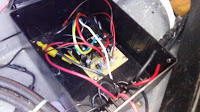
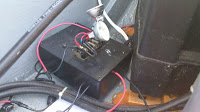
For my charge controller, like with most other things, I went as cheap as I could. I bought a Coleman Air charge controller kit (easy to find on ebay) and put it inside a hobby electronics box from Radio Shack. For the dump load I just wired 2x50W lightbulbs (which is about 8 amps) onto the top of the box and have them set to trip off when the battery reaches a certain voltage. This is instead of having the dump load tied directly to the solar panel because I also have the wind generator tied into the same setup.
Here’s a picture of the charge controller setup. I think when I install the second solar panel I’m going to need to use a beefier dump load, but I’m not really sure what that will be yet. Any suggestions for something that can sap a lot of electricity as needed without being expensive or annoying us when it’s turned on?
