Before you begin reading, be warned that this post is more
oriented towards boat nerds who are curious about how we took our rudder apart
and put it back together.
Here was when we first discovered that our rudder had peeled like a banana while out at sea.
The first and most difficult step was disassembling the rudder.
Taking off the tiller head was no problem. The rest of the disassembly
process posed a particular challenge because a) the collar that holds the
rudder post was completely corroded and b) we decided to remove the rudder while
we were still in the water, which meant removing the hardware underwater. For the record, you can remove your rudder in the water, but it’s tricky and it’s best to get to know your boat before you have to tear it apart. Unfortunately, life doesn’t always grant you the time to learn about things beforehand.
As far as the collar goes, Jeff tried all the right tricks.
He began by coaxing the hex bolts out with every rust dissolver, penetrating catalyst, and lubricant known to man-kind. When that failed he turned to brute
force, using a chisel and hammer to loosen its grip. Next it was heat. He
purchased a blow torch and (with wet rags all around to dissipate the heat)
applied the flame to the bolts. They still wouldn’t budge. At that point he pulled out the
power tools. He finally got it off with a combination of the jig saw (with
metal blades), the Dremel and a screwdriver (with titanium bits). Two days of
frustration later it was loose and he was happy.
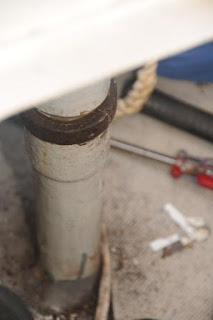 The stubborn collar.
Our rudder is held on with a gudgeon that wraps around the
rudder post under water. The gudgeon is held in place by two large bolts with
nuts and a bit of 5200 (super adhesive). Our whole toolbox got submerged. We
used various wrenches, the socket wrench, numerous screwdrivers, the hammer and
the crowbar to remove the bolts and free the gudgeon from its very snug fit on
our skeg. That took another two days (punctuated by some hiking and beer with
friends).
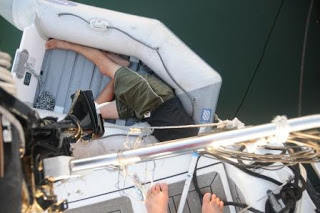 Stubborn man.
When the rudder was freed it was still being held in place
by the hammock that Jeff had placed beneath it. In anticipation of the rudder
post sliding out we had also attached an NRS strap around the rudder and tied a
rope to that strap and had also tied another rope to the rudder. The hammock
was great for slowly lowering the rudder, but once it was down past the post,
it flipped over backwards (since the pole is thick and heavy) and started
sinking. We were able to use the two ropes to muscle it towards the surface and
bring it into daylight. After that whole ordeal we took a well-deserved day
off.
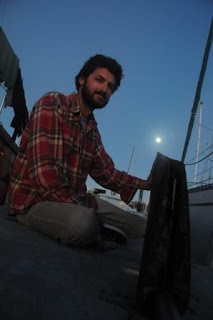 Split shot 1.
 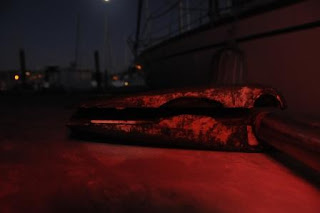 Split shot 2.
On Monday we called the nearby boatyard to inquire about
fixing our rudder in the yard since we would be doing some grinding and sanding
and didn’t want the paint and fiberglass to get in the water. We also needed a
good working space for the glasswork. For only $10 a day they set us up in a
sweet little workspace that was completely enclosed (meaning we could work rain
and shine).
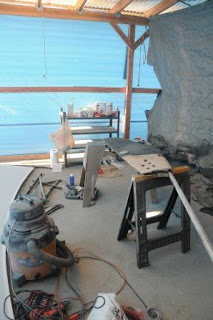 Awesome workspace.
Before I get to the repair, it’s important to know how our
rudder is constructed. We have a long stainless pole with a stainless steel
plate welded to the bottom. The stainless plate looks like swiss cheese, with
big holes throughout. We can’t quite tell how large the stainless plate, but it
is surrounded by a lot of hardened fiberglass resin (we think someone just
poured it in there) and several layers of fiberglass on the outside to maintain
the shape. Needless to say, it’s a really heavy rudder. The benefit of this construction is that it didn’t take long to
dry out (as compared to rudders with a foam core). It was bone dry within a day
(after sitting out in the sunshine).
Day one of the repairs Jeff ground back the paint and
fiberglass and also drilled through the swiss cheese holes in the plate so that
we could make epoxy “bolts” that would hold both sides together and provide a
lot of strength. We decided just to repair the split area rather than deconstructing
the whole rudder.
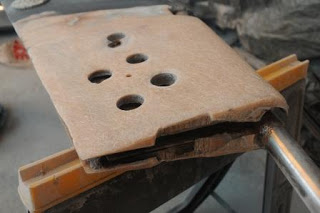 Day one progress.
On day two we made up a couple batches of thickened epoxy (using
the colloidal silica) and smeared it into the seams. Jeff had also cut a couple
notches on the outside of the tiller that we could use to adhere the two sides
of the split. We filled those notches and the swiss cheese holes with thickened
epoxy (using colloidal silica and chopped fiberglass strands). The most
important thing at this point was making sure that the two sides were held
tight. We used some C-clamps, spring clamps, a quick grip clamp, a strap clamp
and an NRS strap (basically anything we could find). The gentlemen at the yard
gave us some miracle plastic that we used to keep the clamps off of the drying epoxy.
They use it when they’re vacuum bagging fiberglass and epoxy (don’t ask me what
this means…I don’t know, but it sure sounds like I know what I’m talking
about.)
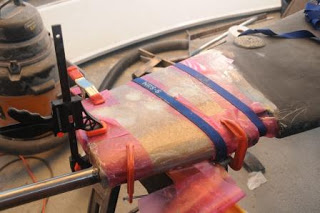 Day two progress. CLAMPS!
Day three was the fiberglassing day where we put our
newfound knowledge and skills to the test. Again the owners of the yard hooked
us up with some scrap fiberglass (don’t know the weight or weave, but it was
pretty). We put one layer of this glass on each seam and then put another layer
of glass over the whole thing to tie it all together. We were pleased as punch
with the outcome (did I use that saying right?). We let it dry for a couple
hours and Jeff returned to put some epoxy and fairing compound over the whole
repair. It was dark by the time he started and he couldn’t get the work light
to function…so he used a headlamp and asked forgiveness in advance in the event
that it was ugly (it wasn’t).
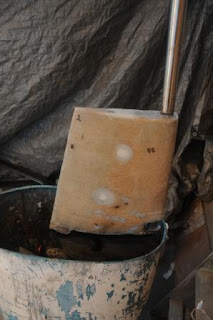 Day three progress. Ain’t it pretty?
On day four we admired our work for awhile, sanded down the
fairing compound so that it was all smooth and pretty and slapped some bottom
paint on it. I must say that our repair looks better than the original. Jeff
returned after lunch to drill out and replace the zinc on the rudder while I went grocery shopping.
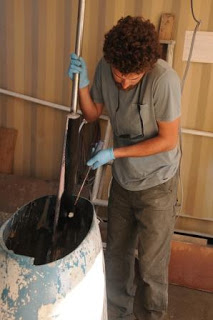 Day four progress. PAINT!
And that brings us to day five, which is when we hauled out (an experience unto itself).
We reconstructed the rudder on day six and it only took us a couple of hours
(as compared to the four days it took to deconstruct). Putting the post back in
the shaft wasn’t too terribly difficult. Jeff greased up the post real good and
with the help of some passersby we shimmied it into the very small, tight hole. It slid right in once we had it at the right angle. Yes, I do know how dirty that sounds…get your mind out of the gutter.
Now we’re busy hanging with friends and planning our next steps! It’ll be good to get back in the water. Jeff even let slip that he’s excited to get back out on the ocean.
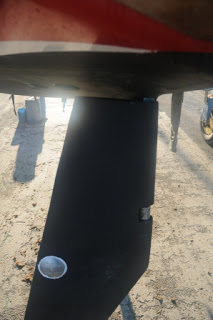 Looking like new.